
Step 1: Open the HTML Editor
- Open the email template you want to edit.
- Switch to the HTML or Source Code view of the email editor.
- Copy the existing HTML code if you would like to keep a backup before making changes.
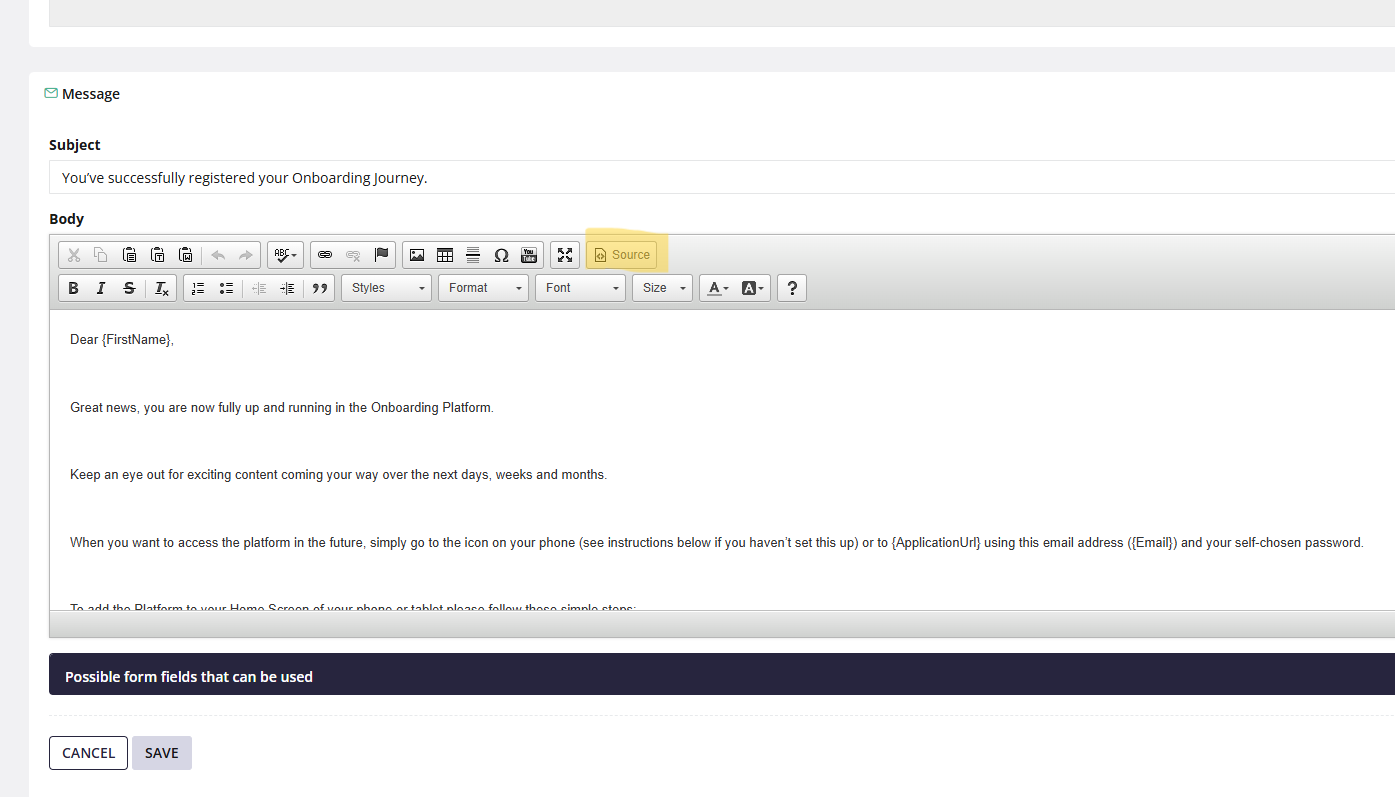
Step 2: Add the Button Code
Copy and paste the HTML code below into the location where you want the button to appear in your email template.
<div><!--[if mso]> <v:roundrect xmlns:v='urn:schemas-microsoft-com:vml' xmlns:w='urn:schemas-microsoft-com:office:word' href='{InvitationLinkRawURL}' style='height:36px;v-text-anchor:middle;width:200px;' arcsize='50%' strokecolor='#e6e6e8' fillcolor='#fafafb'> <w:anchorlock/> <center style='color:#2f353e;font-family:sans-serif;font-size:13px;font-weight:bold;'>Accepteer uitnodiging</center> </v:roundrect> <![endif]--><a href="{InvitationLinkRawURL}" style="background-color:#fafafb;border:1px solid #e6e6e8;border-radius:18px;color:#2f353e;display:inline-block;font-family:sans-serif;font-size:13px;font-weight:bold;line-height:36px;text-align:center;text-decoration:none;width:200px;-webkit-text-size-adjust:none;mso-hide:all;">Activation Link</a></div>
Step 3: Replace the text in the button
Change the button text by editing:>Activation Link<
This is the label that will appear on the button.
💡 Tip: Want to check how your email will look to recipients? Use the HTML Preview Editor to preview the email and make sure your button appears and functions as expected before publishing your changes.